|
Printable PDF Tip & Tricks booklet.
Making Glass Pens
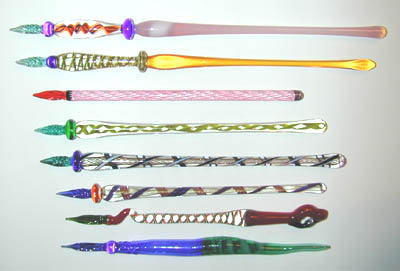
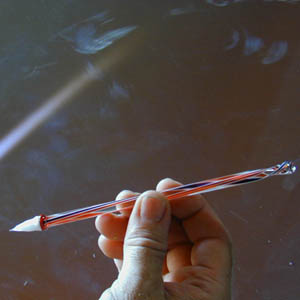
The process to make the glass pens in the this picture is shown below.
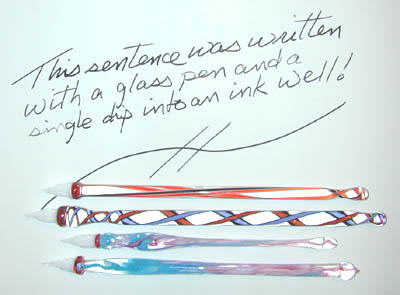
These pens were all made by Ralf Greiner-Adam.
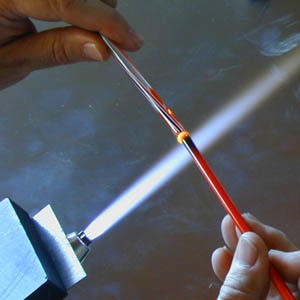
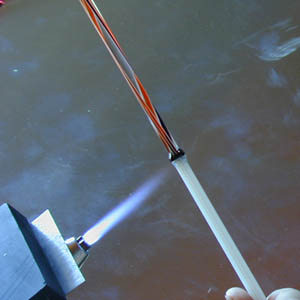
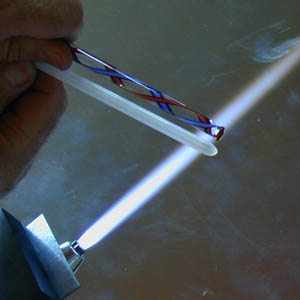
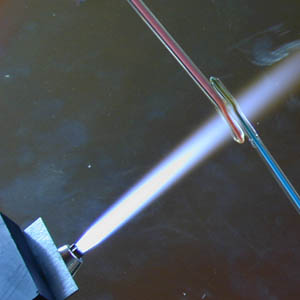
Start by pulling off the end of the cane to a symmetrical point with tweezers. This removes the sharp edge that can cause scum, straightens the pattern on the cane and prepares it for the next step. Large diameter candy cane rods are thermal shock sensitive. Heat them very slowly.
Round the end of the cane. This will become the handle.
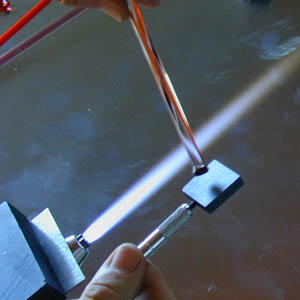
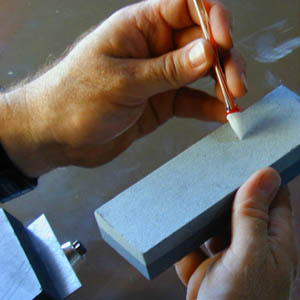
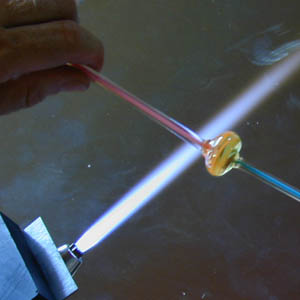
Apply a small amount of color to the end.
Use a marvering paddle to manipulate the color to cover symmetrically. Flatten it to form a disk. After flattening the end to shape it, re-heat it to slightly round it again.
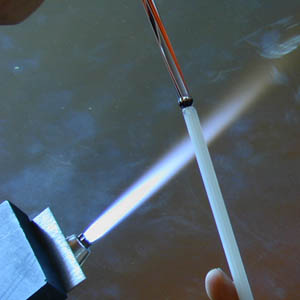
Prepare a ribbed cane as you did the candy cane. The ribbed cane is used to make the pen nib. Its ribs hold the ink.
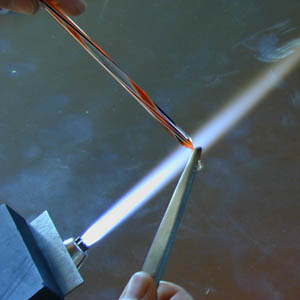
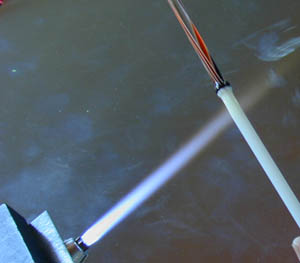
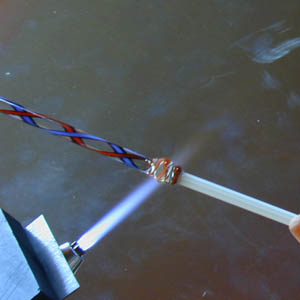
Heat the rounded ends of the handle glass and the nib glass. Do not heat the glass canes on their sides. It is easier to align and adjust the two glass canes when their ends are rounded rather than when flat.
Reduce flame size and make it slightly oxidized to fuse the two glass canes together. An oxidized flame is more needle shaped then a neutral or reduction flame. Also, it is a little cooler just outside the actual flame area than the other flame settings. This flame setting gives you the type of control you need to make the joint without distorting it.
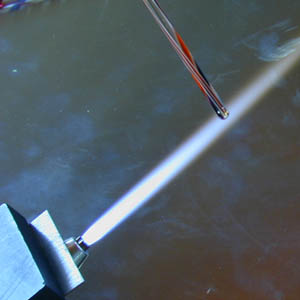
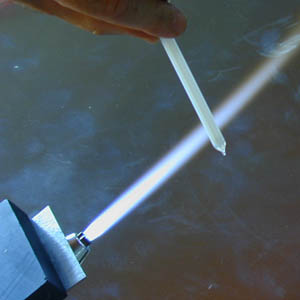
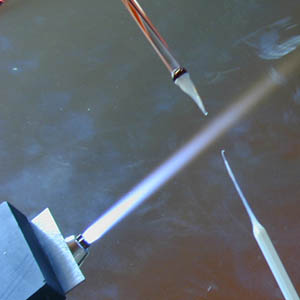
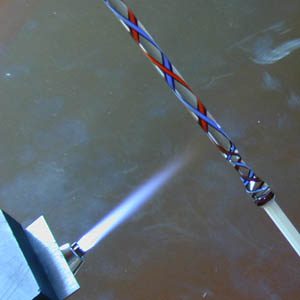
Return the flame to neutral. Working near the flame tip, gently heat the nib glass. It is very important to continuously and smoothly rotate the glass to insure an evenly tapered nib. If you heat the glass too hot or for too long, the nib ribs will melt away and the pen will not be able to hold ink.
Remove the glass from the flame and pull at either side of the heated area to create the tapered nib. If the area being heated is very narrow, the nib will be short and not very tapered. If the area being heated is too wide, the nib will be very long and narrowly tapered and also more delicate and susceptible to breakage. You can put a twist in the nib glass as you pull it. Remember to use a very gentle heat to prevent the ribs from melting away. As the point forms, pull quickly to bring it to a fine point. The left over nib glass can be burned off away from where the nib tip will be. The actual tip of the nib is created by snapping it off at the desired location. If you try to create the finished nib tip in the flame, it will not flow the ink properly. The smaller you pull the point, the finer the line the pen will write. Creating the nib is the most critical and hardest part of making the pen. You will need to practice this step several times.
Next, form the other end of the pen to the desired length and design.
Next, form the other end of the pen to the desired length and design.
The pen shown above had a straight handle. There are as many ways to form and shape a pen as your imagination can come up with. Below are two methods of forming a shaped handle.
In the first method, prepare the two glass canes as before.
After joining the handle glass to the nib glass, as before, move the flame to the handle glass near the joint. Heat it and work it until it balls up and is larger in diameter than the handle glass.
By directing the flame at the handle side of the ball of glass, you can heat it in such a way that it will form a contouring grip in the pen handle when stretched. Like making the nib, this also takes practice.
Finish the pen as before.

This next method of handle forming uses two colors of Filigrana cane.
Prepare the end of each glass cane as you did in the first step of the first pen. Fuse them to each other as shown.
Form the glass into a symmetrical ball, putting as much swirl into it as desired.
Pull out the handle shape as the previous handle and finish the pen.

Top of Page
|
